AEM Forms: Custom Functions in Adaptive Forms

For centralized management of scripts

Creating Custom Functions in Adaptive Forms


In many companies it happens that certain scripts in forms are needed for several forms. Maintaining these scripts individually in all forms costs time and money.  


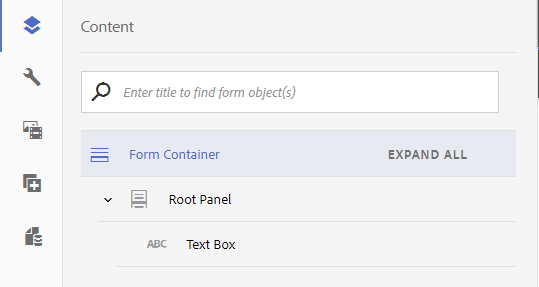
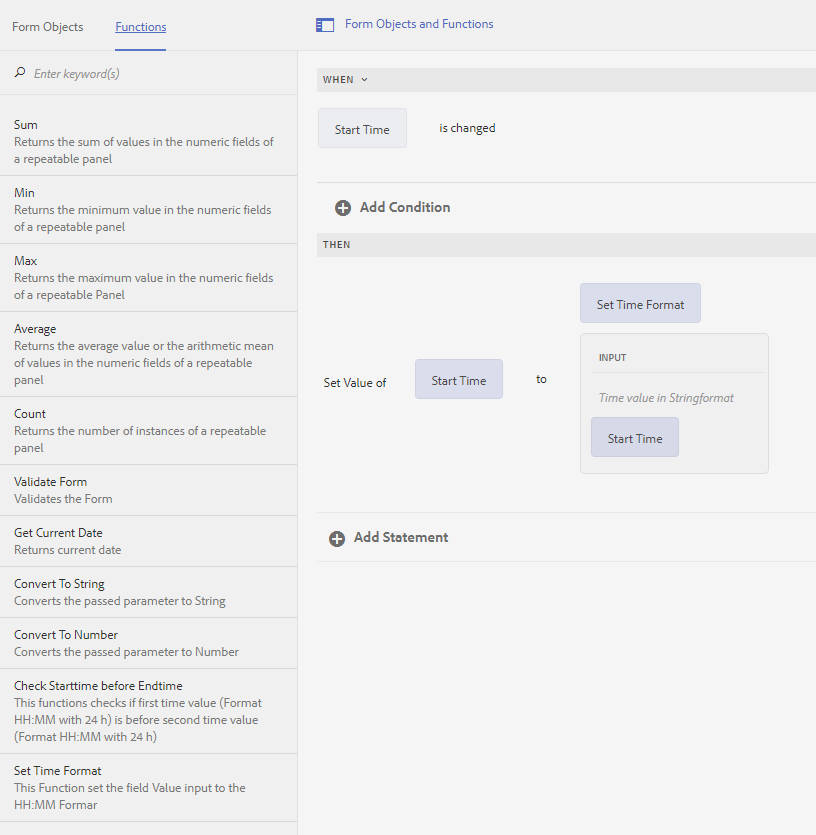
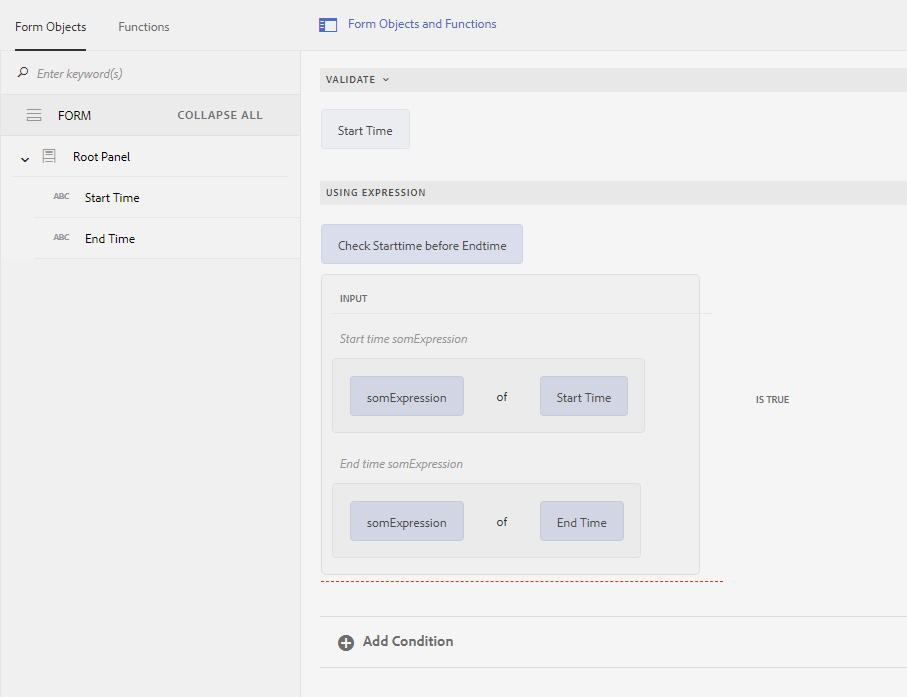
With the help of Custom Functions, these scripts can be managed locally in CRX/DE, i.e. on the server side. However, the scripts are executed on the client side and also loaded as such. The scripts can be dragged and dropped into the rules in the so-called "Rule Editor".


The following steps must be performed to write a custom component script.


1. Preparation

  • Creation of the required nodes, directories and files in CRX
  •  Call the server URL <ServerURL>:<ServerPort>/crx/en
  •  Create the ClientLibraryFolder. At this point it must be decided which path should be used for this.

In earlier versions, the folder was stored under "/etc/clientlibs".

In current versions, it should be created under "/apps", as shown in the example below.


At eggs, we store the corresponding files in the project directory under "/apps" by default.

Therefore, a directory for the company (eggs) and a directory with the corresponding project (blog) will be created.


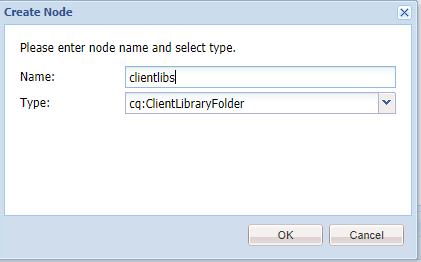
Below that the node cq:ClientLibraryFolder is created:

clientlibs

We usually call this node "clientlibs".

This node now requires the property "categories" of type "String" and in the "Value field" the name "Libs Identifier". In our example we created the category "af.blog.inputsupport" and activated the property "Multi" to correct the type to a string array.

properties

After clicking on "Add", you have to confirm the input(s) for the categories and you can also extend them.

categories

Then the attribute "allowProxy" of type "Boolean" must be created with the value "true"; otherwise the file in the "/apps" folder would not be accessible.

allow-proxy

In this new node different directories and files have to be created.

First you have to create a "js.txt" file (it will be explained later what it has to contain).

Then you have to create a folder for the JS scripts. We use the directory "js" for this.


Below that we create the subdirectory "validation" to be able to group the new scripts better.

Under this node we create a file that will contain our JavaScript (timefield.js).


Now we can start filling the files. In the file "js.txt" the following must be stored:

#base=js

validation/timefield.js

components/timefield.js


#base=js“ specifies in which directory the JavaScripts as well as the CSS files can be found.

The lines below indicate under which path (from the base path) which file is found. In this example, we have 2 entries. Under "validation/timefield.js" there is a simple script that validates time fields to a valid time. Under "components/timefield.js" is the script that validates the input of a time field.


2. Creating the functions

Now the functions are created that we want to use in the forms. For this we have to edit the file "components/timefield.js".

/**
* This Function set the field Value input to the HH:MM Formar 
* @name setStringInput Set Time Format 
* @author eggs unimedia GmbH 
* @license MIT/X11 License (http://opensource.org/licenses/MIT)
* @param {string} strFieldInput Time value in Stringformat
* @return {string} normalized Time Value in format HH:MM 
*/
function setStringInput(strFieldInput){
	var newFieldValue;
    switch(strFieldInput.length){
      case 1:
        newFieldValue = "0"+ strFieldInput + ":00";
        break;
      case 2:
        newFieldValue = strFieldInput + ":00";
        break;
      case 3: 
        newFieldValue = "0" + strFieldInput; 
        break; 
      default: 
        newFieldValue = strFieldInput; 
    }

    if(newFieldValue.indexOf(":") < 0){
      if(newFieldValue.length == 4){
        newFieldValue = newFieldValue.substr(0,2) + ":" + newFieldValue.substr(2);
      }
    }
    return newFieldValue; 
}

Für die Validierung muss die Datei „validation/timefield.js“ bearbeitet werden.
/**
 * This functions checks if first time value (Format HH:MM with 24 h) is before second time value (Format HH:MM with 24 h)
 * @name isFieldValid Check Starttime before Endtime
 * @author eggs unimedia GmbH 
 * @license MIT/X11 License (http://opensource.org/licenses/MIT)
 * @param {string} strSomExpStartTime Start time somExpression
 * @param {string} strSomExpEndTime End time somExpression
 * @returns {boolean} Boolean value that shows if the end time is after the start time
 */
function isFieldValid(strSomExpStartTime, strSomExpEndTime){
    var objStartTime = guideBridge.resolveNode(strSomExpStartTime);
    var objEndTime = guideBridge.resolveNode(strSomExpEndTime);

    //Reg Ex for 24h time fields 
    var regexpress = /^([0-1]?[0-9]|2[0-3]):[0-5][0-9]$/; 
    var testResult = true;

    if(objStartTime.value && objEndTime.value){
        var isStartValid = regexpress.test(objStartTime.value);
        var isEndValid = regexpress.test(objEndTime.value);

        //Set Error Message for a field with an invalid Field Input
        if(!isStartValid){
            objStartTime.validateExpMessage = "Invalid valid value for the time field. Please enter a value in HH:MM 24h format.";
        }
        if(!isEndValid){
            objEndTime.validateExpMessage = "Invalid valid value for the time field. Please enter a value in HH:MM 24h format.";
        }
        //Check if one of the fields failed the 24h check 
        if(isStartValid && isEndValid){
             if(objStartTime.value < objEndTime.value){
				//All validations are successfull 
                testResult = true;
            }else{
                //Start Time is after End Time
                //caller field will be set invalid and proper error text will be set
                objStartTime.validateExpMessage = "Invalid Time periode. Please enter a earlier time for the 'start time'.";
                objEndTime.validateExpMessage = "Invalid Time periode. Please enter a later time for the 'end time'.";
                testResult = false;
            }
        }else{
            //error message is already set to a proper text, field that calls this function will be set to invalid 
            testResult = false;
        }
    }else{
        //Empty Fields
        //empty field value are checked with Mandatory check. We don't need to invalid the field at this point of validation
        testResult = true;
    }
    return testResult;
}

After everything has been saved in the CRX/EN, we can continue with step 3.


3. Adjusting the Adaptive Form

First, we have to pass the ClientLib to the form and you have to specify the form container in the ClientLib. 

form container

Here we need to enter the category in the box "Client Library Category" we have specified in CRX earlier:

properties

Now we insert two text boxes into the form. The first one is called "Start Time" and the second one "End Time". 

In both fields we apply the following rule:

custom function

This rule should look as the following in the rule overview:

custom function

Next, we set up the validation:

form objects

The final result now looks like this:

  •  Input into the "Start Time Field": 12:00
  •  Input in the "End Time Field" 9:36

Since the end time is before the start time, the following error message appears:

incorrect

After entering 15 in the End Time field, the time is validated and is now valid:

correct